Comments/disagreements on Omastar solo raid guide
I know there are some good players out there who have failed to solo Omastar, despite ostensibly having counters that are more than adequate. I reread the Omastar solo guide on this site, and I think there is some advice on the page that is misleading, or could be misinterpreted. I have succeeded every time I have tried to solo Omastar, with a lineup that is not remarkable other than the fact that it consists exclusively of reasonably strong grass attackers (on my first Omastar solo attempt, I had to fight the boss three times, before going with an all-grass lineup and winning with 20 seconds to spare).
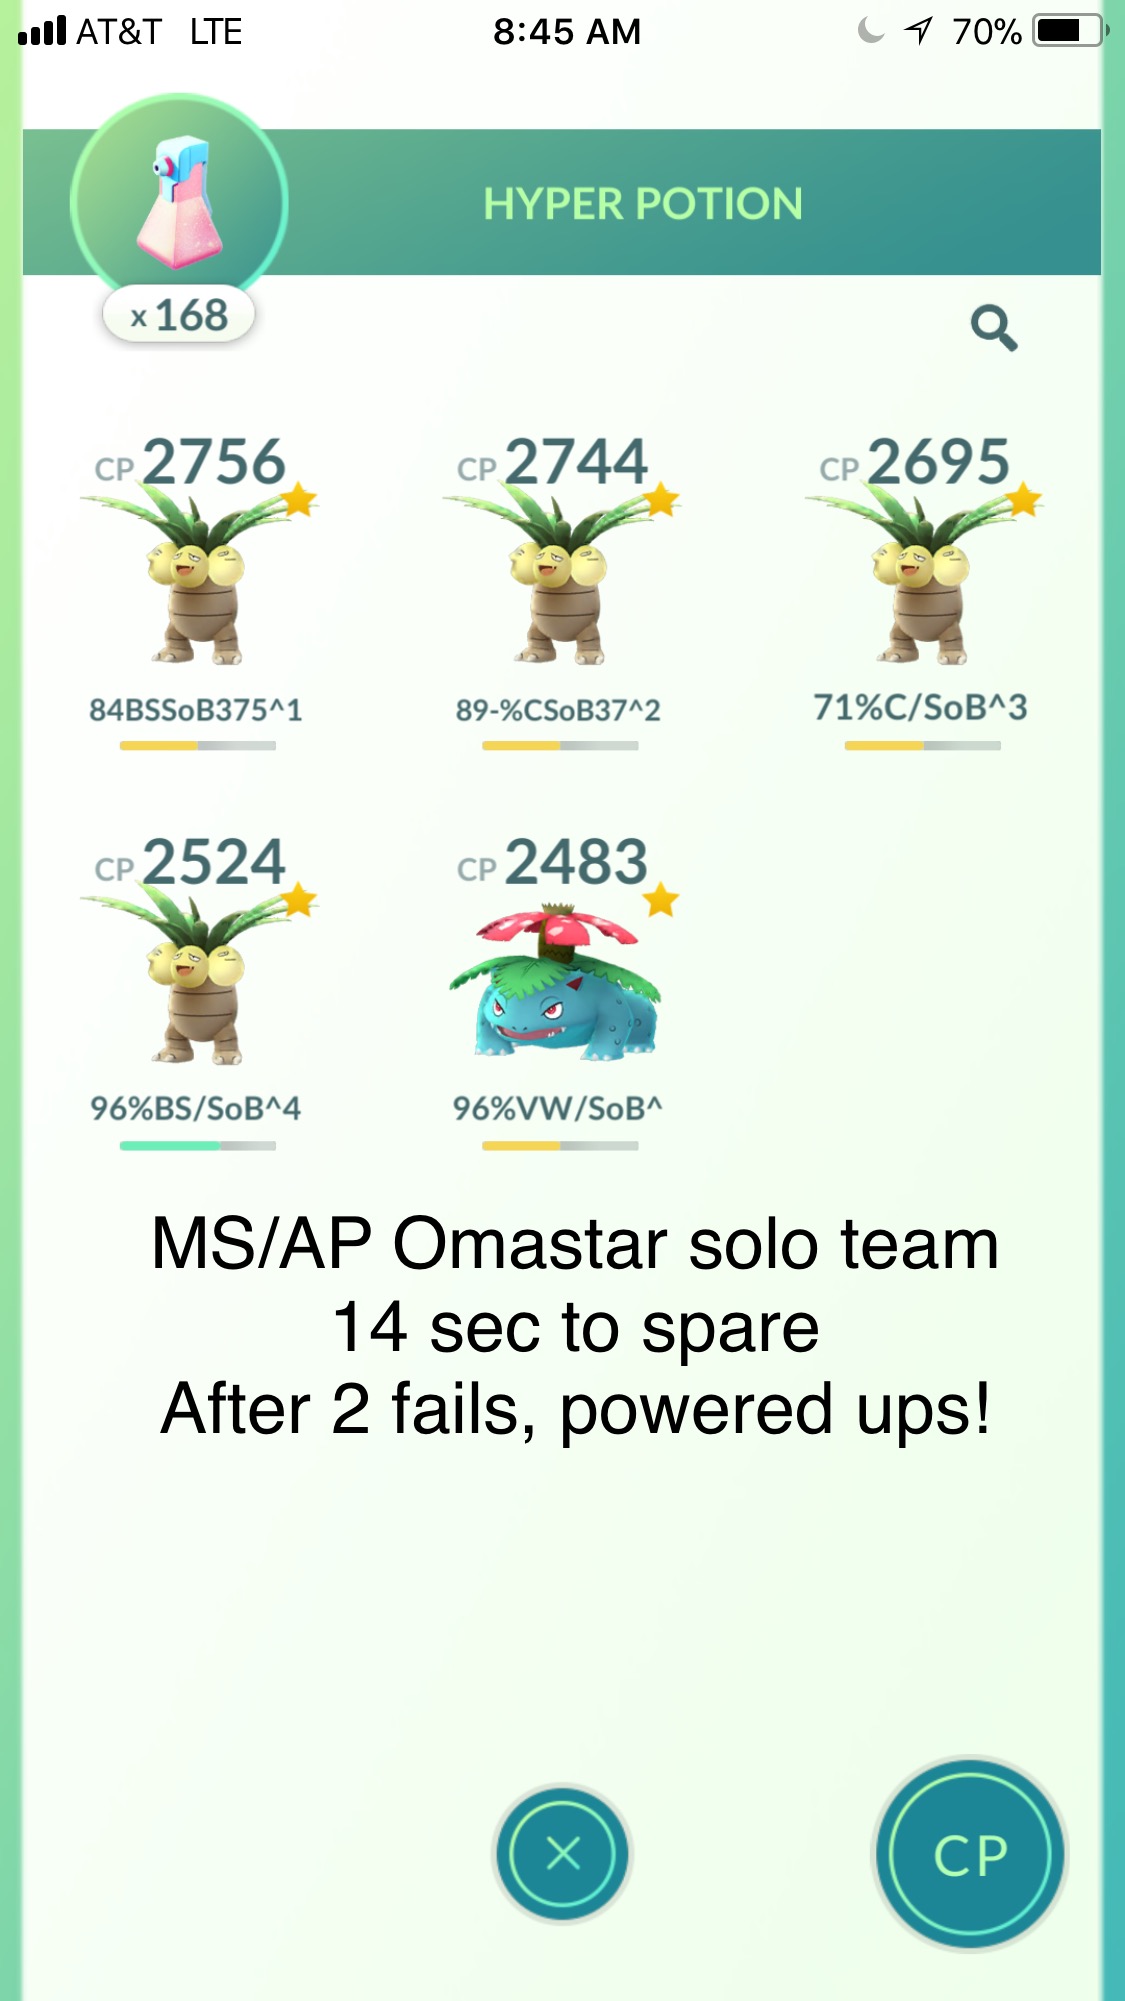
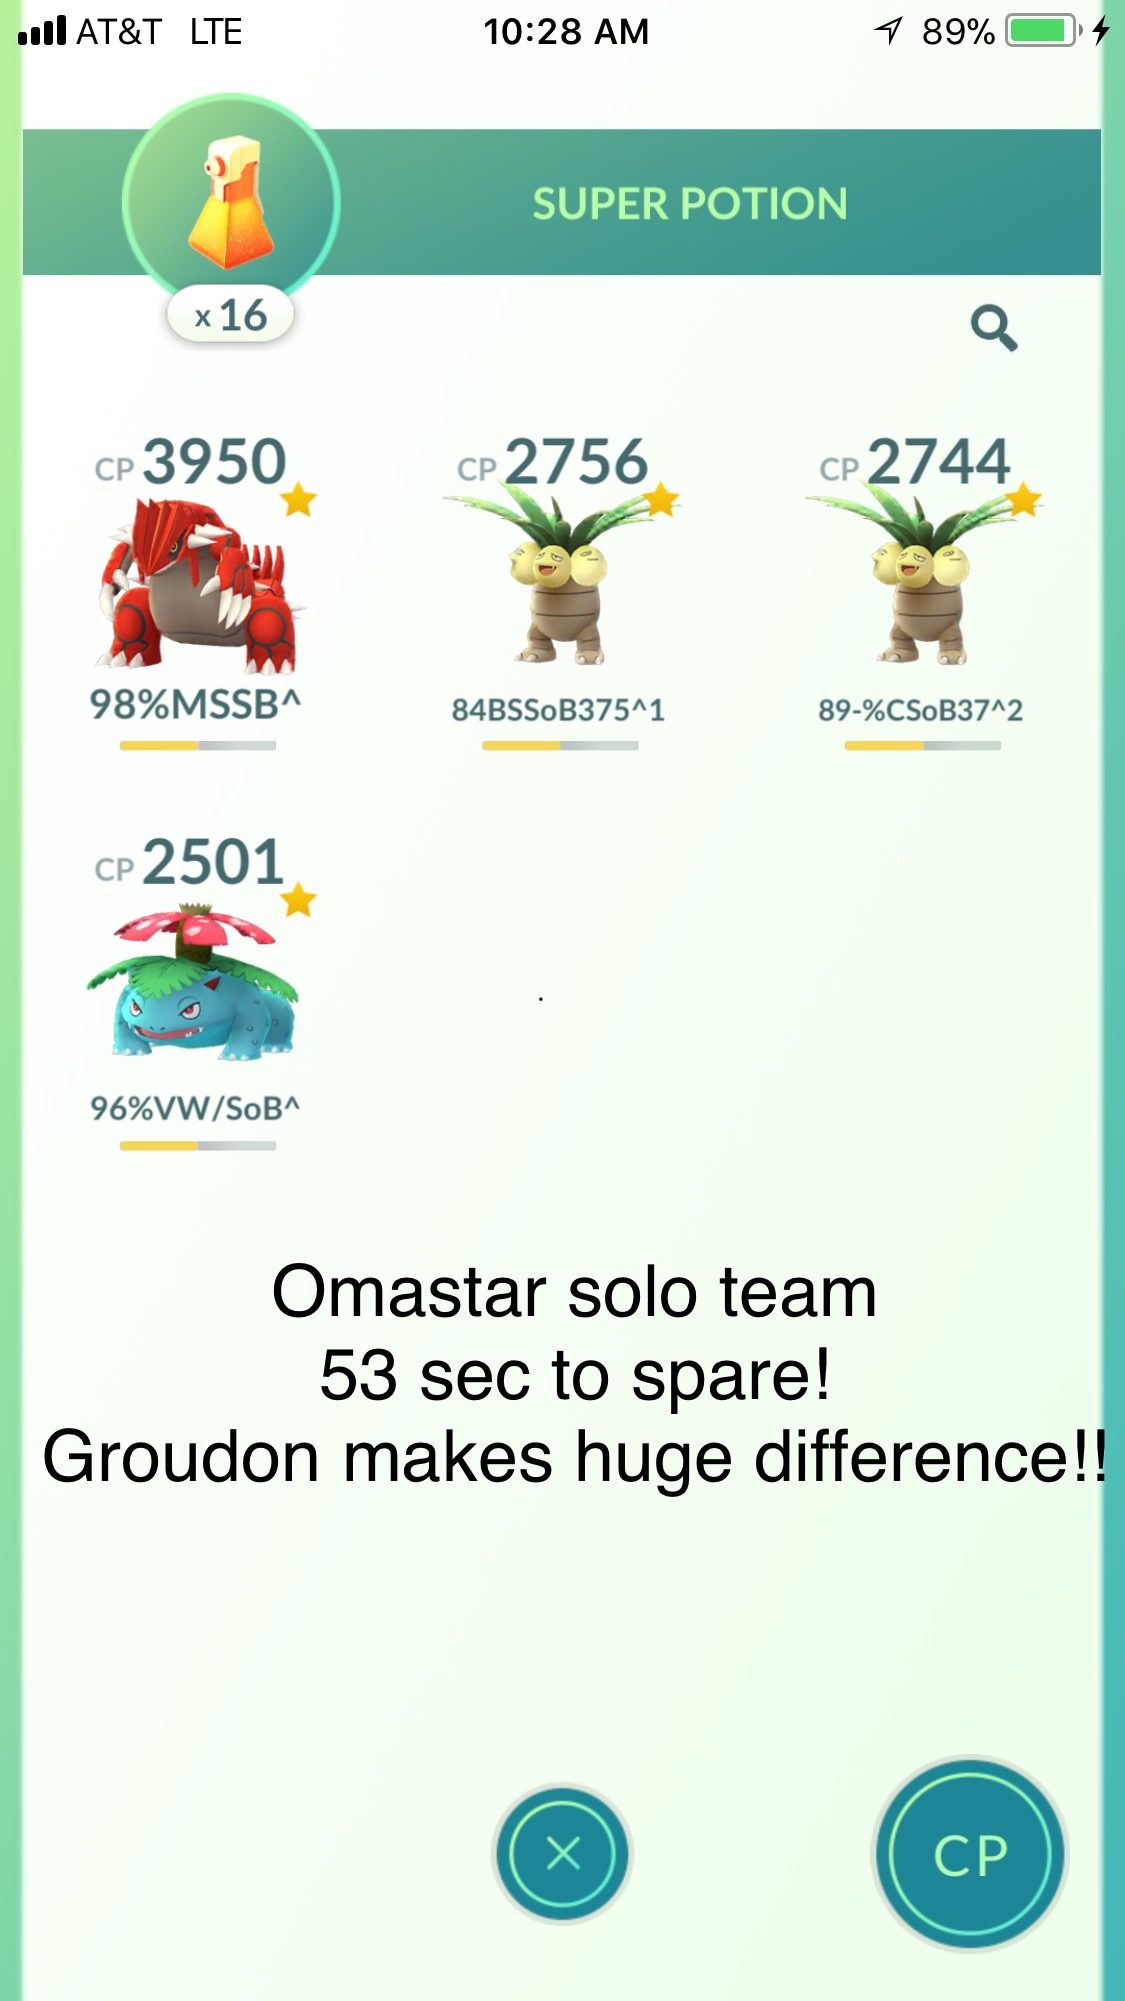
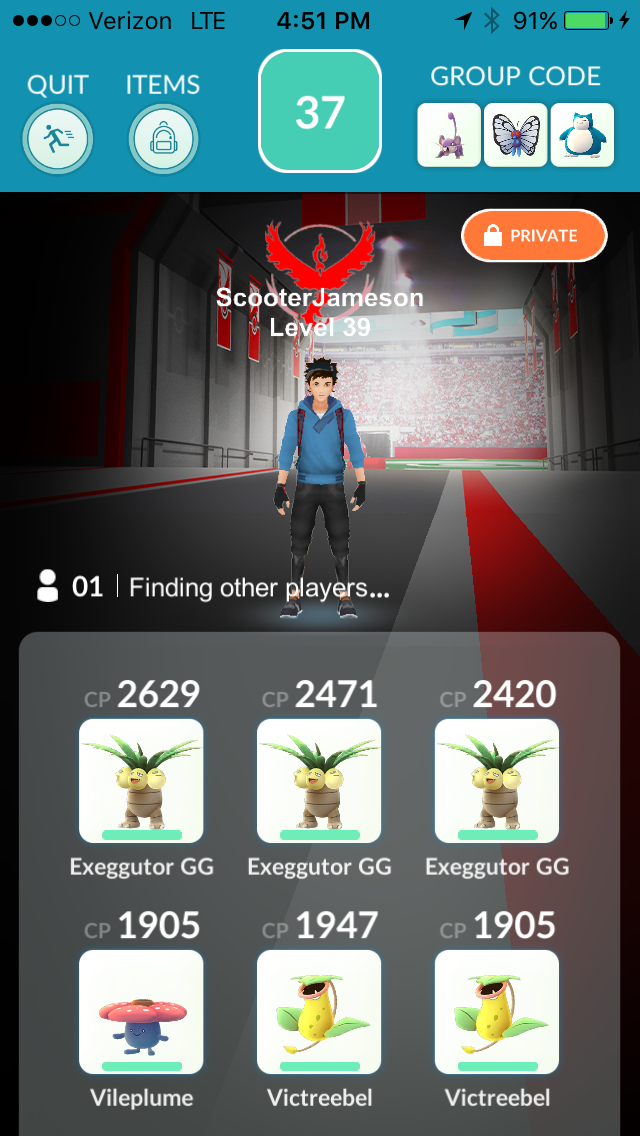
My Omastar team, which always wins with plenty of time to spare:
2670 Exeggutor BS/SoB
2471 Exeggutor BS/SoB
2420 Exeggutor BS/SoB
2111 Venusaur RL/SoB
1905 Victreebel RL/SoB
1947 Victreebel RL/LB
If someone is failing with counters comparable to these, I believe the only plausible explanation is too much dodging. And I believe the solo raid guide overemphasizes the importance of dodging, or perhaps inadvertantly gives the impression you need to dodge more than you really do. The first time I successfully soloed Omastar, the boss had rock blast, and I dodged zero times. Rock blast doesn't do very much damage, and it is hard to dodge, so it's better to just eat the damage, keep spamming away, and take advantage of the extra energy gain from taking hits. The same goes for hydro pump, which I most recently successfully soloed with zero dodging. But it is critical that you are using powerful double-grass attackers, so that you are doing the necessary damage while eating those hits.
I disagree with the Omastar solo guide that rock blast is the most difficult charge move to face. It may be the most difficult to dodge, but you don't need to dodge it at all. Actually, I believe it is the easiest to face for that reason.
Forget the solo guide's advice to consider using Machamp for survivability against the rock charge moves, unless you don't have any more strong level 30 double grass mons. With the higher DPS of double grass attacks, survivability will take care of itself, because you will kill the Omastar boss before it kills you.
I do agree with the solo guide that ancient power must be dodged, but the wording of the guide makes it sound like AP needs to be dodged every time. It doesn't; 3-4 times throughout the entire battle should be enough, preferably timed to allow an extra solar beam to be delivered. Dodging any more than that will hurt more than help, because of lost DPS. And AP is much easier to dodge than the other charge moves, because it is so blatantly telegraphed by the animation, so it is tempting to want to dodge every one, but resist that temptation.
The Omastar solo guide says to aim for two solar beams per attacker. It is nice if you can get off two solar beams, but it is not critical. Against the hydro pump Omastar boss, my grass attackers were only getting off one solar beam (with possibly one exception), and it was still enough, because I was continually delivering double super-effective bullet seeds and razor leafs. It can be frustrating to have a fully or near-fully charged solar beam negated by eating a charge move, but it won't prevent you from completing the raid as long as you are not wasting time unnecessarily dodging.
One more thing, everybody who has one loves their C/SoB Exeggutor, but it is barely adequate against Omastar (same for ES/SoB or ZH/SoB). Even BS/SeB is much better. You can probably get away with one C/SoB in the lineup, but it is going to reduce DPS, and therefore reduce your margin for error. The solo raid guide is absolutely correct that the key to soloing Omastar is continuously exploiting its double weakness to grass.
I hope this helps somebody out there accomplish something they haven't been able to up to now.
Answers
I totally respect that. I'm just trying to help people that might be frustrated as to why they can't solo Omastar, when they have a team of attackers that are as good or better than mine.
And I 100% agree that guides, moveset rankings, tier lists, etc. should be considered as educated opinions only, and not as the definitive answer to which mon / moveset / strategy is superior to another. Gather as much information as you can, and then decide for yourself.
Just use a SoB Groudon! It will fire four SoB before fainting against all movesets not including HP and even then two HP are safe.
I disagree with you/don't believe that you finished the raid with this lineup with only 6 SoB total and 3 (?) LB? That won't get it done. There need to be more mons getting off two, I aggree with the guide here. Victrebeel from my point of view is hard to get off two SoB with but that's just me.
Yes, SoB Groudon is a huge help. I was assuming no legendaries, because many people don't have them, but my daughter has a CP 3100 SoB Groudon, and she was able to solo the same HP Omastar with the Groudon, four BS/SoB Exeggutors between 2100-2200, and a Victreebel.
Going from memory, against the recent HP Omastar, I might have gotten two SoB's off from one of the mons, but I don't think so. I'm pretty sure the first Eggy had its second SoB negated at the last instant by a HP, and I don't think I manged two from any of the others. LB is different, because you can get off five LB's in the same lifespan (one SoB means almost, but not quite, two).
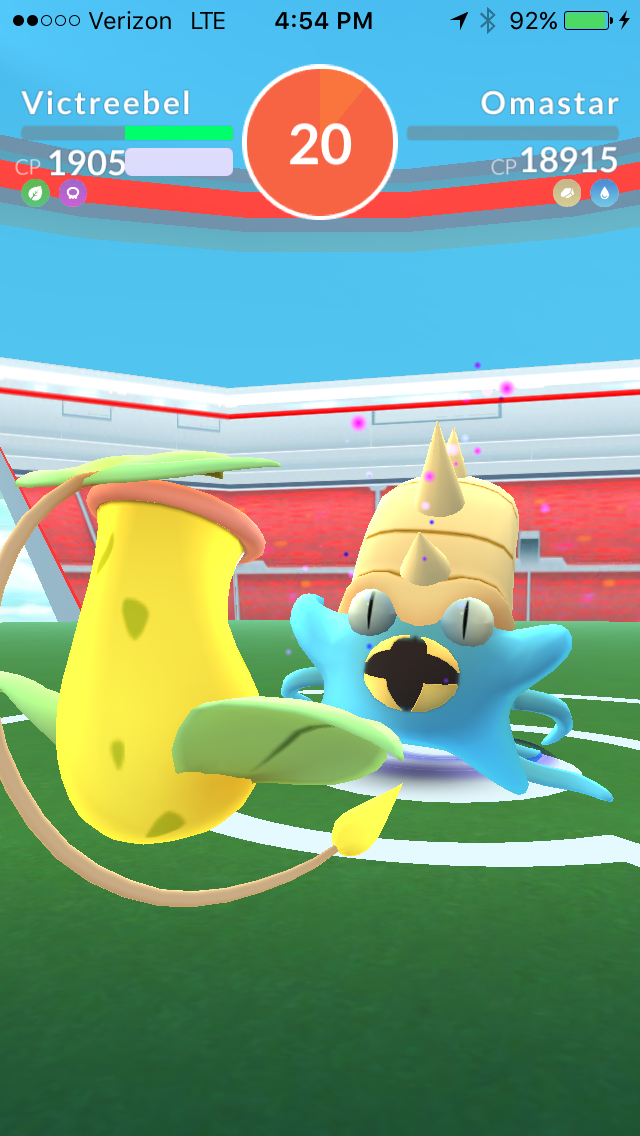
I have no reason to lie about this. I've done a lot of these Omastar raids now (maybe 8-9), and I stopped dodging after the first one, except against AP, and you can't generally get off two SoB's without dodging. And yet I beat the Omastar every single time. Here is a picture of the first time, when I dodged zero rock blasts. The only difference is I had the LB Victreebel in the #5 slot, and a ~1900 Vileplume in the #4 slot instead of the Venusaur. And as I recall, that was before I realized my best Eggy was one level away from an important BS breakpoint (subsequently powered up that one level).
I think that the guide is a blueprint, but not the only way to solo clear Omastar. Like Peach said, its best that "everyone should find their own way of playing it." I had an Omastar solo clear that was helped by weather, yet had no Confusion Exeggutors, no double grass pokemon. The one I went against had Mud Shot and Rock Blast & like you, I didn't think it was that bad. Either way just take the info from the guides and keep playing until you see what combination of your pokemon work best.
Alright, so I agree with you in principal that dodging is less important than the guide makes it seem, but you also over generalize about the need for double grass moves on Exeggutor. I have soloed Omastar 8 times (at least once with each moveset) and only had to retry one time (the first time I played against HP). I basically never get to the last Vileplume. Those Eggys put in the bulk of the work (because without careful dodging the others faint out pretty quickly). This is my team:
2747 Exeggutor Ex/SoB
2741 Exeggutor C/SoB
2276 Venasaur RL/SoB
1986 Vileplume RL/PB
1866 Victreebel RL/SoB
1904 Vileplume RL/SoB
My advice, dodge with your Eggy's to get an extra SoB with them, and the rest just spam it.
I don't doubt for a second that you did it with this lineup, although your Eggs & Venusaur are powered up quite a bit more than mine. My intention here is to explain how it can be reliably done with mostly level 30-31 pokemon that are readily accessible to almost everyone.
I really believe that, assuming a player has a minimally adequate team, dodging too much causes a lot more solo raid failures than not dodging enough. And not just against Omastar.
And yes, the Victreebels faint rather quickly without dodging, but that is OK, because they do enough DPS in the meantime.
I just ran a pokebattler simulation against Omastar with "unknown moveset," no-dodging scenario. Here are some times-to-win:
100% L36 CP 2750 C/SoB Exeggutor: 163.7 sec., faints x4
100% L36 CP 2750 BS/SoB Exeggutor: 146.9 sec., faints x4
100% L30 CP 1944 RL/SoB Victreebel: 155.7 sec., faints x6
96% (15A) L36 CP 2710 C/DP Machamp: 174.2 sec., faints x4
In the battle log, Victreebel never gets off two SoB's from a single mon, yet it only faints six times. So, it holds its own for survivability, and more than holds its own for DPS. Obviously, simulations are not perfect, and "unknown moveset" requires some generalizing, but high DPS equates to survivability, because the important thing is to survive longer than the boss, not for some fixed amount of time.
Many things here are wrong.
You do want to aim for 2 Solar Beam per attacker. A L40 Exeggutor with BS + Beam does 323 HP damage per charge move cycle. That's not even close to sufficient to defeating Omastar without wasting time on rejoining. If it does 2 cycles of BS + Beam but fails to hit the second Solar Beam, 411 HP damage isn't enough either. If you complete 2 charge move cycles per Exeggutor, you need 5 Exeggutor to win. This is even more important at lower levels or with weaker attackers.
Dodging Rock Blast is definitely necessary if you aren't L40 and/or don't have a full Exeggutor or Groudon squad.
C + Beam and ES + Beam Exeggutor have approximately equal time to win as Tangela when both are at L40. This puts it at around the 8th or 9th fastest attacker that still has a generous margin of error.
You nitpick about pieces of advice that you think are too general (such as aiming for 2 Solar Beam per 'mon) but in a comment reply agree with another user that these guides should serve as a blueprint. Which is it? The guides are a blueprint. If you're timing out on Omastar but end the raid with 3 of your Grass attackers unused, then yeah, maybe the game is telling you to dodge a little less. I don't have to tell you that.
As usual, your response to constructive criticism is to attack the commenter, and argue why you are right and they are wrong, even if it is a subjective point, such as the ambiguity of your advice on dodging. Your attitude exemplifies why you probably should stay behind the scenes running simulations, and leave the article writing to the other members of the excellent Gamepress staff, who do a better job of keeping their egos out of their interactions with site users.
I could argue about the merits of my actual practical raid experience vs. your theoretical simulation math, but I don't see any point. There are a number of members here who have tried to follow the advice in your Omastar guide, and they have failed with teams that should be able to get the job done. I encourage them to try my suggestions, and post their results.
You are just plain wrong about the necessity of dodging rock blast. The picture I posted above of a no-dodge vs. rock blast victory shows 20 seconds to spare, and my last Victreebel with half of its health still remaining. The entire lineup is pictured below. It was done in early November, before weather-boosting existed, and I posted a summary of my results here at the time. I'll leave it to others to decide whether I have any reason to lie about the fact that I ignored rock blast for the entire battle.
Here is a link to my original report of my first Omastar solo, when I dodged rock blast zero times. I reported getting two SoB's off from each SoB attacker, and while that surprises me, I will not dispute what I wrote at the time. Also, the first Exeggutor had not yet been powered up to its L35 breakpoint for BS against Omastar.
https://pokemongo.gamepress.gg/q-a/omastar-solo-report
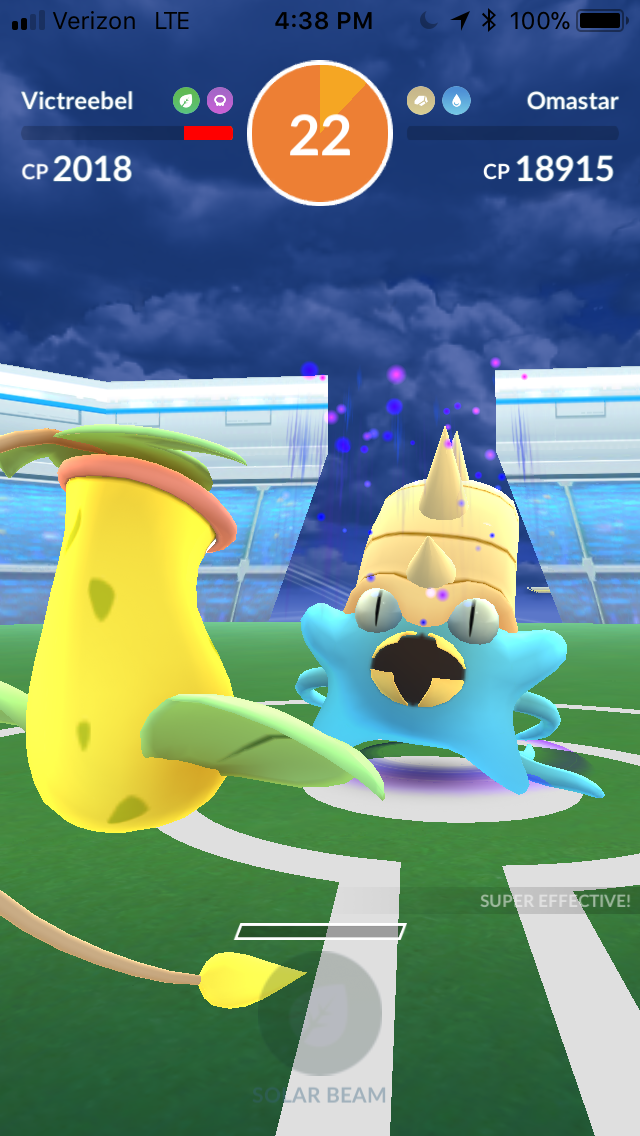
A few days ago, when I defeated WG/HP Omastar, again with no dodging, I got off two SoB's from at most one attacker, and still won without having to reenter the battle. The first Exeggutor had been powered up to its final breakpoint, and I now realize that I replaced the L31 Victreebel shown above with a L35 69% (15A) CP 2018 Victreebel with the same RL/LB moveset (picture below).
My only point about not needing to launch two SoB's per attacker is that if people are getting hung up on that and overdodging because of it, they can stop, because it is not necessary.
I'm not going to change elements of the article that are correct because you don't agree. That's not how it works, sorry.
Nowhere in the Omastar solo raid guide do I mention that dodging Rock Blast is critical. The dodging advice section consists of:
* Hydro Pump and Rock Blast can snuff out a Solar Beam before it hits
* Ancient Power is especially critical to dodge for lower level players
* Aim to use 2 Solar Beam per Grass-type attacker before fainting
All of which are true. I don't really understand what your problem is; you have a penchant for picking fights with no reason.
Please keep in mind that your voice is not the only one that matters. I've observed feedback about the difficulties of Omastar's charge moves and the various ways in which players failed to win the raid. The article in its current form addresses those problems.
In the meantime, I'll take your compliment to the rest of the GamePress staff as a glowing commendation directed at me. I've picked at and edited almost every article on this site.
a guide is exactly that - points you in the directions but doesn't do it for you. completely agree with what you say, my first oma (wg/hp which is probably easiest) i was confounded why it wasn't going down fast enough even with suggested level counters and my team not being K/O'd so TM'd a higher level psychic egg over to grass and tanked HP on that and damage flew up - was at 50% by time second big egg went down and my lower bulk other grasses required some charge dodging. finished with time to spare over always dodging with eggs.